Introduction
Windows enterprise environments form the foundation of most organizations. For Digital Forensics and Incident Response (DFIR) investigations, a thorough understanding of domain controllers—which log crucial user authentication and activity—is essential. This lab provides hands-on experience in setting up a realistic Windows domain environment, complete with a Windows Server 2019 Domain Controller and Windows 10 workstations, enabling security professionals to develop critical practical skills.
Overview
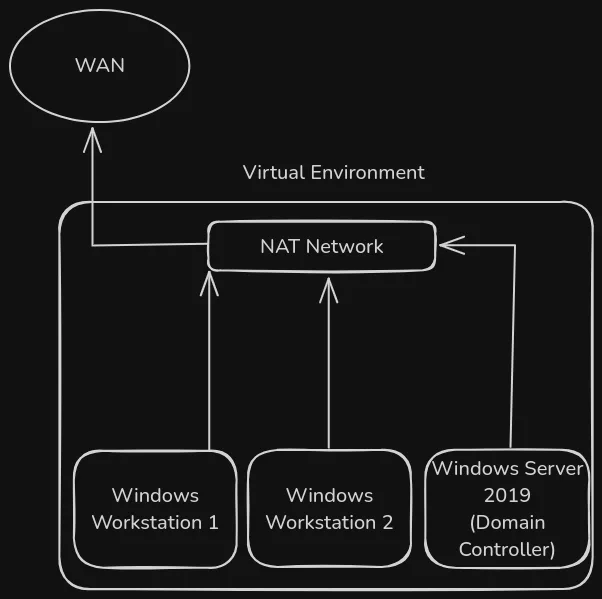
Topology
Requirements
- 16 GB of Memory (2GB RAM per machine + Host)
- 60 GB of Disk Space (20GB per machine)
Prerequisite
Working Virtual Machine Software.
I will be using VirtualBox since it works well and is easy to learn. You can use other solutions if you prefer.
Windows Server 2019 ISO: https://www.microsoft.com/en-us/evalcenter/download-windows-server-2019
Windows Workstation 10 ISO: https://www.microsoft.com/en-us/software-download/windows10ISO/
Install the Windows Server 2019 VM
Hardware Configuration
After downloading the ISO from the above link.
Create a new VM and select the downloaded ISO.
Provide it with 20GB of disk space, I am using VDI disk image but you can use whatever disk image is supported by your VM software.
Provide it with 2GB of RAM.
According to your CPU Cores, divide the number by 4 and allocate that amount to each VM.
So if your CPU has 8 Cores then provide the VM with 2 Cores.
For the network we have to choose an option that allows our VMs to be connected to the same network and have their own IPv4 addresses
This can be done in virtual box by clicking on “File” at the top left then “Tools” then “Network Manager”
Then inside Network Manager click “NAT Networks” then click “Create” at the top left
Then select the newly created network and name it whatever you want
Make sure to then edit the VM settings and head on over to the “Network” settings and select “NAT Network” and then select the newly created network.
Software Configuration
Do not provide a product key if it asks for one.
Make sure the version of Windows is “Windows Server 2019 Standard (with desktop packages)”
Configure any other options as you see fit.
Install Active Directory Services on the Windows Server 2019 VM
1. Launch Windows Server Manager:
- Access from the Start menu
- Wait for the dashboard to fully load
2. Install Active Directory Domain Services:
- Click “Manage” in the top-right corner
- Select “Add Roles and Features.”
- Click “next” button through the wizard until reaching “Server Roles”
- Check “Active Directory Domain Services”
- Complete the installation process
3. Configure Domain Controller:
- Look for the notification flag in the Server Manager Window (should be on the top right)
- Click “Promote this server to a Domain Controller.”
- If the notification isn’t visible, try refreshing the dashboard
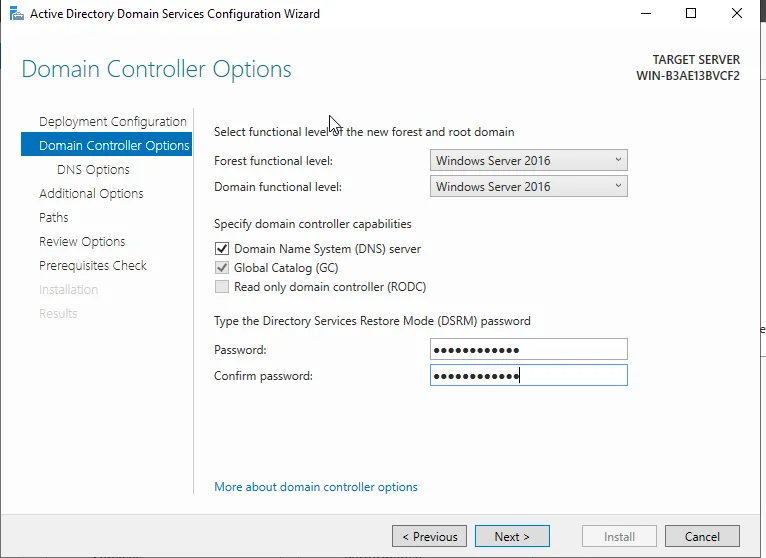
4. Domain Configuration:
- Choose “Add a new forest”
- Enter your domain name as “{YourDomain}.local” (e.g., “khaled.local”)

- Create a Directory Services Restore Mode (DSRM) password (Store this password securely—you’ll need it for recovery scenarios)
- Continue through the configuration screens
- Wait for prerequisite checks to complete
- Click Install when prompted
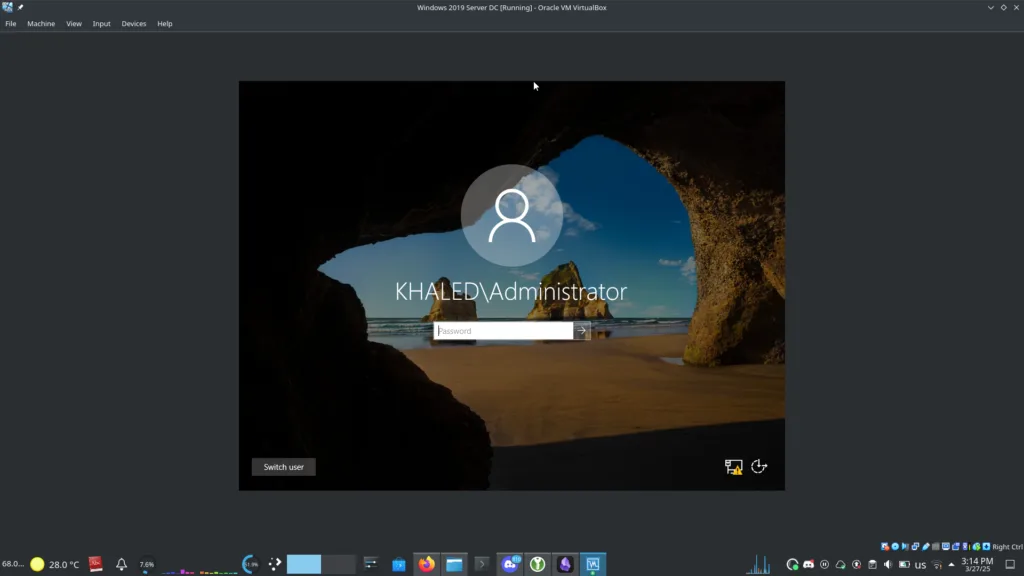
5. Post-Installation:
- The server will automatically restart
- At the next login, notice your username now appears as “DOMAIN\Administrator”
Create Domain Users
Click “Tools” on the Server Manager Dashboard. Now, click “Active Directory Users and Computers. In the new window, select your domain (e.g., cerulean.local), which will display the Organizational Units (OUs) within your domain, such as “Users.”
Open the “Users” folder. This folder contains various security groups and one active user named “Administrator.”
Create one or two additional users, such as “Bob, Adam,” by following these steps for each user:
- On the Left – Right-click on “Users” -> “New” -> “User.”
- Enter the first and last name, using the first name as the username.
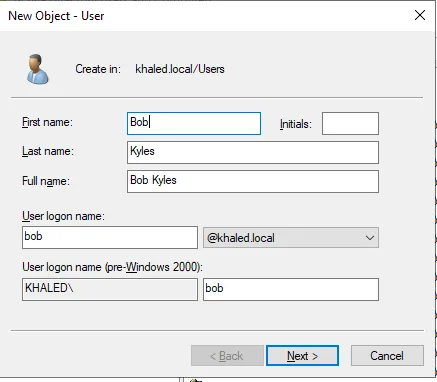
- Click “Next” to set a password. Note: check the box labeled “Password never expires.” and un-check the box “User must change password at next login”
- Confirm any prompts that appear.
Install Windows 10 Workstations & Add Them To The DC
Hardware Configuration
Same as the Windows Server 2019 VM
Software Configuration
Select “I don’t have a product key” then select “Windows 10 Pro”
Select “Custom: Install Windows Only (Advanced)”
Select the virtual hard drive that we created (should be 20GB)
Wait for windows to copy the necessary files
Keep progressing until you reach “How would you like to set up?” (see below image)
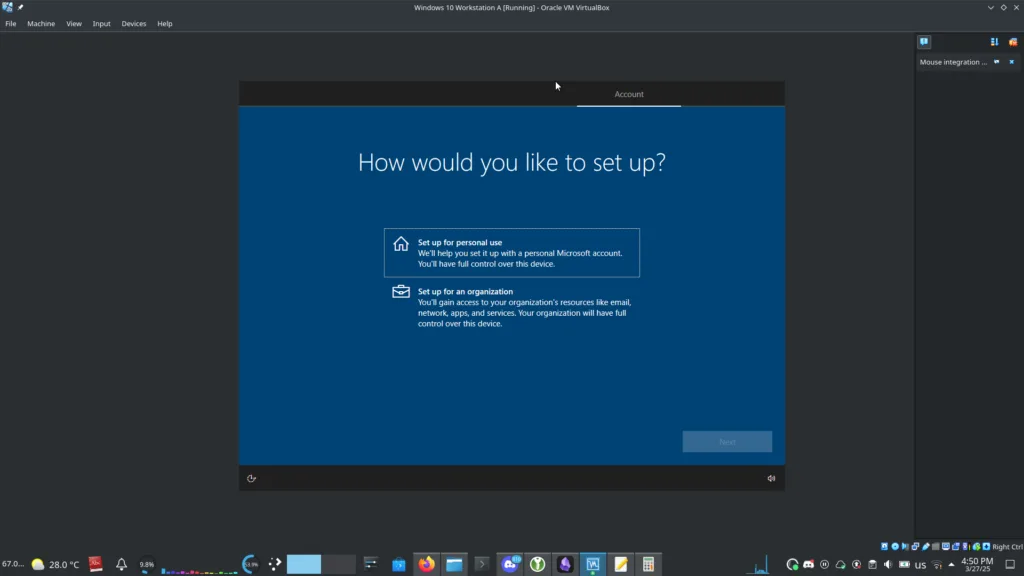
Click “Set up for an organization”
Then at the bottom left click “Domain Join Instead”
Choose a username that is different to the usernames we used in the windows server, this is done to avoid possible confilicts
Choose a password
Keep clicking through the setup as you wish until you reach the windows desktop
Head over to the Windows Server VM and click the start menu button and type then open “CMD”
Type “ipconfig” and make a note of the IPv4 address
Head back to the Workstation VM and open “CMD” and type “ping” followed by the IPv4 of the Windows Server VM, in my case it looks like this:
ping 10.0.2.15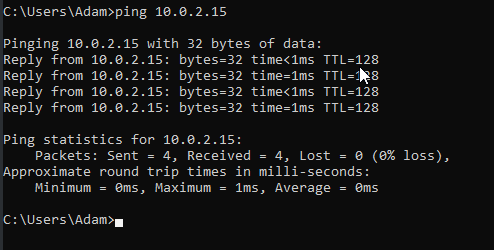
Configuration of the Windows 10 Workstations
DNS
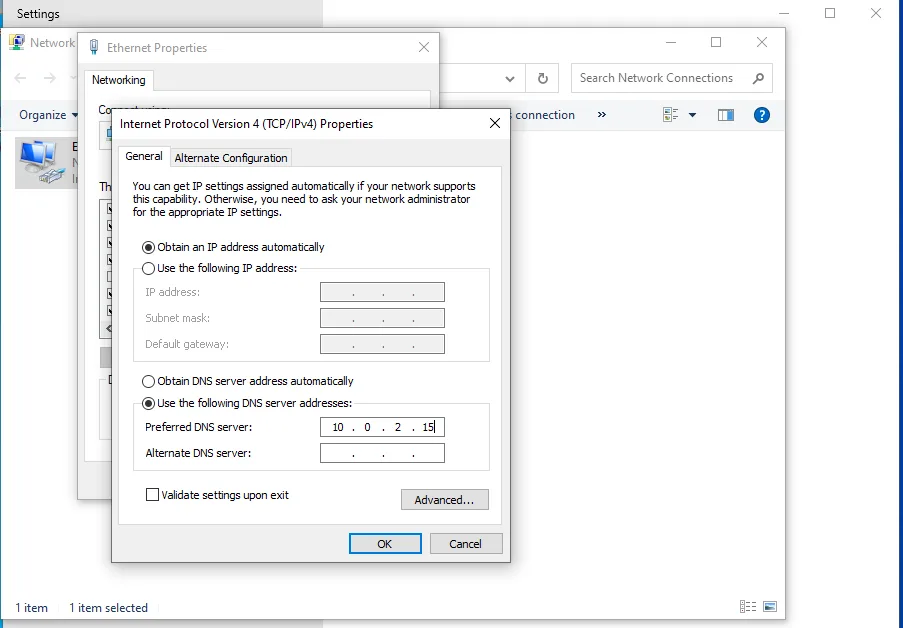
Set the Domain Controller’s IP as the workstation’s preferred DNS server:
- Right-click the Ethernet adapter in the taskbar at the bottom-right corner and select Open Network & Internet settings.
- Choose Change adapter options.
- In the next window, right-click the adapter and select Properties.
- Highlight Internet Protocol Version 4 (TCP/IPv4) and click Properties.
- Select Use the following DNS server address and enter the domain controller’s IP address.
- Click OK and close all windows.
Join the Workstation to the Domain
- Open Windows Settings -> Accounts -> Access work or school.
- Click the [+] Connect button.
- At the bottom of the new window, select Join this device to a local Active Directory domain.
- Enter your domain name (e.g., “khaled.local”) in the new window.
- If prompted, provide domain administrator credentials. If no prompt appears, double-check the network settings to ensure the workstation can communicate with the Domain Controller and confirm that the Domain Controller’s IP is listed in the DNS settings.
- Assign the desired domain user to this workstation and grant “Administrator” privileges if needed. Reboot the workstation.
After rebooting, the login screen should display the username in the format DOMAIN\user.
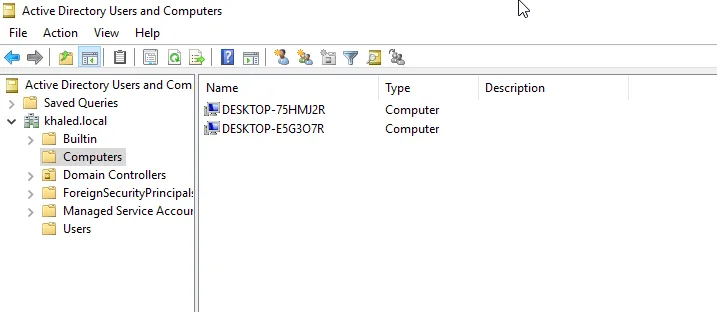
To validate the setup, go to the Domain Controller’s Server Manager dashboard -> Tools -> Active Directory Users and Computers.
Expand your domain (e.g., khaled.local), navigate to Computers, and verify that the new workstations appear in the list.
Finish the Setup
Once the VMs are set up, power them down and take snapshots. That way, you can always revert back and start with a fresh environment.
Also make a note of all the VM’s login information so that you don’t forget it in the future.